I was updating my own Power Portals homepage, rolling out a new Weekly Coaching package. Once the page was live I shared the link to check it, and what came back was a grey box. No title, no image, no description, just the raw URL sitting there like nobody had bothered to tell it what it was.
That is when I actually learned what an Open Graph tag is and how it works. I had scrolled past neat little link cards in other people's shares for years without once wondering why mine did not have one. Once I understood the mechanism, I wanted it built properly into Power Pages, not bolted on for a single page.
Along the way I hit the obvious wall first: the Header web template, which looks like the natural place to add a site-wide <head> tag, turned out not to touch <head> at all. While digging for a way around that, I stumbled on a 2020 blog post by Oliver Rodrigues, who had already worked out the fix, content snippet and all. I could have found that with one search before I even started. 🤦♂️
No harm done, though. There was still plenty left to work out for how Power Pages looks today, Studio sites, the enhanced data model, and a security trap that catches almost everyone who tries this. Thank you, Oliver, for the pointer that saved me the last mile: his original post is worth a read.
That grey box is a conversion problem, and it is one of the cheapest ones you will ever fix. You do not need a shop, a payment provider, or a redesign. You need about twenty lines of Liquid in the right web template.
Here is the part most teams get wrong on the first attempt, though: the fix that feels obvious is a security incident waiting to happen.
Why Power Pages gives you nothing here
Microsoft documents plenty about Power Pages. Open Graph is not part of it. Search Microsoft Learn for Power Pages and meta tags and you get results for other products entirely. The only indexing-related article is the one about adding a robots.txt file so search engines know what to crawl.
So link previews in Power Pages are not a feature you switch on. They are something you compose out of primitives that are documented individually: web templates, content snippets, and Liquid.
The good news is that the most important primitive works in your favour. Microsoft states it plainly: "Liquid is processed on the server side, so the output is rendered as plain HTML to the end user." A crawler that never executes a line of JavaScript still receives fully rendered tags. Whatever you build in Liquid, LinkedIn and Teams will see.
Step 1: own the <head>, page by page
Open Graph tags live in <head>. Where you reach it in Power Pages depends on which kind of site you have, and getting this wrong is the first place the plan falls apart.
If your site was built with the newer Power Pages Studio experience, the drag-and-drop, component-based editor that new sites default to, there is no web template that lets you touch <head> site-wide. The web template named Header, the one that looks like the obvious place to add site-wide tags, is not <head> content at all. Opened directly, its source starts with a <div class="navbar-expand-xl navbar ...">. Checked against the rendered DOM, the same story: the navbar sits in <body>, and <head> never contains it. <head> on a Studio site, charset, viewport, the existing meta tags, the stylesheet links, is generated by the platform around whatever your page template renders. There is no web template for it.
There is, however, a site-wide way in through a different door: a reserved content snippet. Create one named exactly Head/Bottom, and Power Pages injects its content into <head> on every page, no page template surgery required. This is not something Microsoft's own product documentation spells out for Open Graph specifically, it surfaces in a 2020 community write-up and a Power Platform forum thread with an accepted answer, so treat it as documented-by-precedent rather than official. Tested directly against this Studio site: it works, a static <meta> tag placed in Head/Bottom shows up in the rendered <head> of every page.
Its one real limit, also tested directly: Liquid runs inside Head/Bottom (filters and objects like {{ 'x' | upcase }} or {{ now }} evaluate correctly), but the current-request objects page and website are not bound there. {{ page.adx_title }} or {{ website.adx_name | escape }} inside Head/Bottom resolve to nothing, and the whole <meta> tag carrying them disappears from the rendered output rather than shipping with an empty content="". Use Head/Bottom for genuinely static, site-wide tags, a literal og:site_name, twitter:card, a fallback og:image, and stop there. It cannot give you a different og:title per page.
For that you still need the second mechanism: a page template with Use Website Header and Footer unchecked (checked by default), wired to a web template. Microsoft's description of what happens when you clear that checkbox is the whole trick: your web template "will be responsible for rendering the entire response in the case that you're rendering HTML, this means everything from the doctype to the root <html> tags, and everything in between." Clear it, and you write the entire document yourself, doctype included, with full access to page, website, and entities, and Open Graph tags become just more lines in your own <head>.
Tested directly: a page template with the checkbox off, pointed at a web template containing a full <html><head>...</head><body>...</body></html> document, rendered exactly that. Every <meta property="og:..."> tag landed in <head>, page.adx_title and website.adx_name resolved to real values there, nothing else came along uninvited. The trade-off is real: you lose the built-in navigation and footer that the checkbox normally gives you for free, and this is a per-page-template decision. There is no way to get per-page dynamic tags site-wide on a Studio site, only the static baseline from Head/Bottom.
Put the two together and you get a sensible split: static site-wide defaults in Head/Bottom, so every page has at least a decent card, and the checkbox-off page template reserved for the one page that actually needs a dynamic, record-driven title and description. That constraint fits the rest of this article better than it first sounds. The teaser page you will build in Step 3 is that one page. You are not retrofitting dynamic <head> control across an entire site, you are building it once, for the page whose job is to carry a rich preview.
If your site predates the Studio experience (a classic Liquid/Bootstrap site, built with layouts like layout_1_column), check your own Header and Footer web template source before assuming either behaviour. On some of those sites, Header and Footer literally wrap <head>...</head> and the closing tags, which would put you back in fully dynamic site-wide territory without needing Head/Bottom at all. Open the template and look. Do not assume.
A static baseline for your teaser page's web template looks like this:
<!DOCTYPE html>
<html lang="en">
<head>
<meta charset="utf-8" />
<title>{{ page.title | escape }}</title>
<meta property="og:site_name" content="{{ website.adx_name | escape }}" />
<meta property="og:type" content="website" />
<meta property="og:title" content="{{ page.title | escape }}" />
<meta property="og:url" content="{{ request.url | escape }}" />
<meta property="og:description"
      content="{{ snippets['OG/Description/Default'] | strip_html | truncate: 200 | escape }}" />
<meta property="og:image"
      content="{{ request.url | base }}/og-default.png" />
<meta name="twitter:card" content="summary_large_image" />
</head>
<body>
{% include 'Header' %}
<!-- your page content -->
{% include 'Footer' %}
</body>
</html>
Note the {% include 'Header' %} and {% include 'Footer' %} lines in the body. Because the checkbox is off, the platform will not add them for you, but the Header and Footer web templates still exist as ordinary includable templates. Pull them back in explicitly and the teaser page keeps the same navigation and footer as the rest of the site, it just also owns its own <head>.
Tested end to end: the includes bring back the navigation links and footer text, but not a single stylesheet. The platform loads CSS and JS separately from Header and Footer, so a page with the checkbox off renders unstyled until you add those links yourself. Open any regular page's <head> and copy what you find there, on this site that was bootstrap.min.css, theme.css, and portalbasictheme.css alongside a couple of hosted bundles. Your exact list will differ by theme, but the fix is the same: add <link rel="stylesheet"> tags for them in your custom <head>.
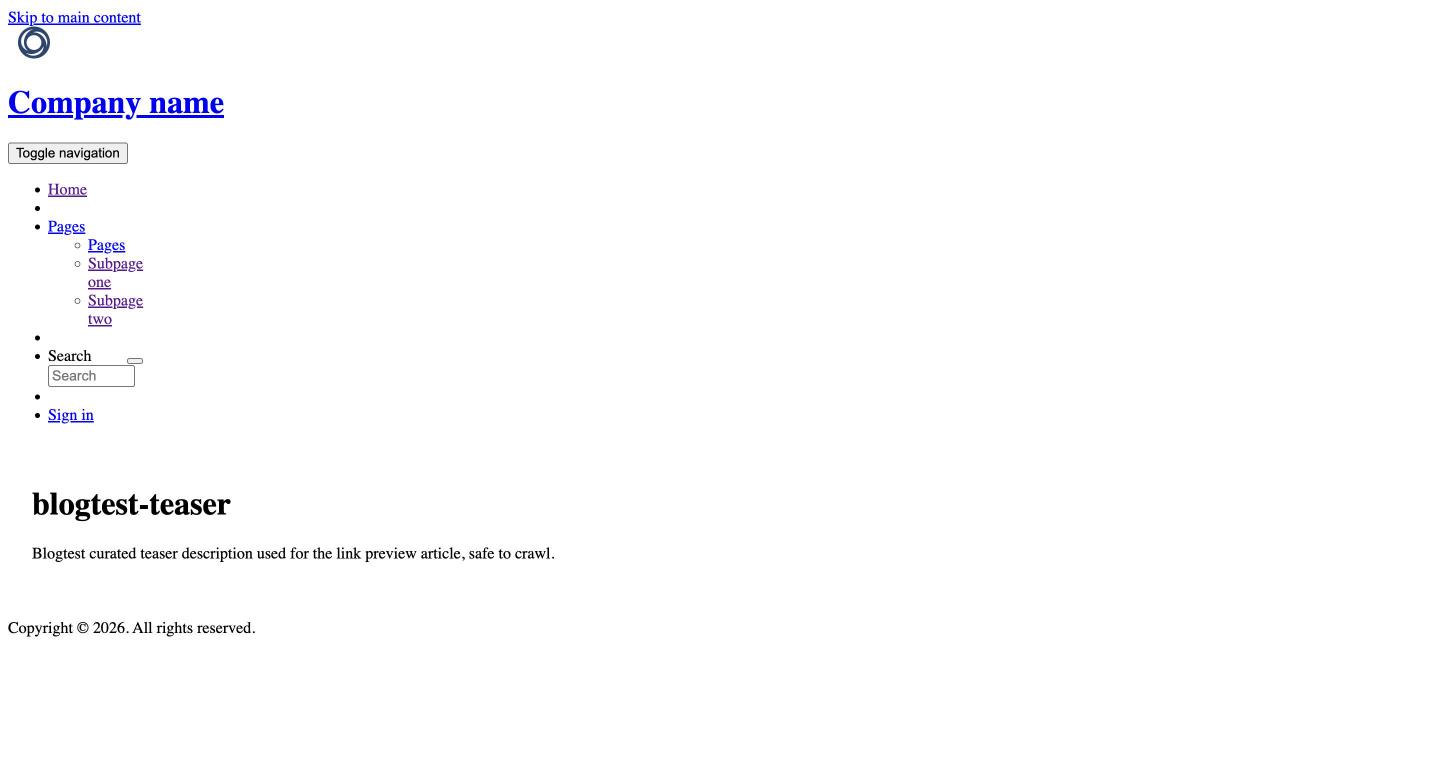
<link> tags yourself.Three things in the <head> block are worth pointing out.
request.url | base
request.url is already absolute. Power Pages Liquid has no absolute_url filter, whatever you may have seen in Jekyll or Shopify examples. When you need just the scheme and host, pipe the request URL through base, which Microsoft documents as "Gets the base URL of a given URL".
escape
Not decoration. Microsoft's own guidance on Liquid objects says to "always use escape filter to HTML encode data whenever using Liquid objects to read untrusted data provided by the user". A record name with a stray quotation mark will otherwise break out of your content attribute.
snippets[...]
The description text comes from a content snippet, not hardcoded markup. Content snippets are, in Microsoft's words, "small chunks of editable content that can be placed by a developer in a header, footer, web page or a web template". Marketing edits the snippet. You never touch the template again.
Step 2: reuse it across pages, with a fallback chain
One custom page template is fine for one teaser page. The moment you need the same treatment for several product pages, a fallback chain is what keeps you from hand-writing content= for every record.
The page object in Liquid refers to the current request page and exposes title and url directly. Beyond that, Microsoft documents a general rule that matters more than any individual property: you can access any attribute of the page's underlying Dataverse record by logical name. That is how you reach the Web Page summary column, adx_summary, even though it is not listed as a named property.
That gives you a clean three-level fallback:
{% assign og_title = page.adx_title | default: page.title %}

{% assign og_desc = page.adx_summary %}
{% if og_desc == blank %}
  {% assign og_desc = page.adx_copy %}
{% endif %}
{% if og_desc == blank %}
  {% assign og_desc = snippets['OG/Description/Default'] %}
{% endif %}

<meta property="og:title" content="{{ og_title | escape }}" />
<meta property="og:description"
      content="{{ og_desc | strip_html | truncate: 200 | escape }}" />
Record first, page second, snippet last. The order is the point: the most specific text available wins, and there is always something.
Note strip_html before truncate. The summary and copy fields hold rich text. Feed raw HTML into a content attribute and you get markup fragments in the preview card.
Enhanced data model note: one naming question worth settling if your site runs on the newer enhanced data model: the underlying Dataverse columns are mspp_title, mspp_summary, and mspp_copy there, not adx_title, adx_summary, adx_copy. Tested directly against an enhanced-data-model site, the page and website Liquid objects still resolve the legacy adx_ names to real values, while the mspp_ names return blank through the same objects. This matches what Microsoft states about the enhanced data model directly: sites on it "have functional parity with sites that use the standard data model," with "no functionality gaps," and the design studio and Liquid rendering "work the same, regardless of whether the site uses the enhanced data model or the standard data model." The adx_ names are the documented Liquid object attributes in Microsoft's own current reference for page and website, unrelated to which table actually backs them. Use adx_title, adx_summary, adx_copy, and adx_name in this fallback chain either way.
If your landing page is a table page driven by a record, do not reach for a magic entity variable. Microsoft documents no such global. The documented route is either page.<column>, when the page's underlying record is the current request record, or an explicit lookup: {% assign item = entities['my_product'][request.params.id] %}.
If your portal runs in more than one language, two more tags are worth adding: og:locale for the language of the page currently being viewed, and og:locale:alternate, repeatable, for each other language version that exists. Both take a full locale code, en_US or de_DE, not a bare two-letter language tag. Tested directly: static values for both render correctly and pass LinkedIn's Post Inspector without complaint.
Drive og:locale from whatever your site already uses to know a page's language, rather than hardcoding it once per template, and point og:locale:alternate at the URL of the equivalent page in each other language your portal supports. Crawlers use this pair to pick the right variant to show and to label the one they do show correctly. It is a small addition on top of the fallback chain above, not a second <head> block to maintain.
If the curated page is genuinely an article, two more tags close the loop: og:type set to article instead of website, and article:published_time. Tested directly: LinkedIn's Post Inspector had already labelled the page type as "Article" from context, but left Author and Publish date as "not found" until both tags were actually present, adding them filled in both fields. One trap surfaced along the way: the Liquid date filter combined with a strftime-style format string, {{ now | date: '%Y-%m-%dT%H:%M:%S%z' }}, returned garbled output on this environment, not a valid date, reproducible across repeated calls and with the cache bypassed. The unfiltered {{ now }} rendered a valid date correctly. Do not assume the formatted version works on your site, verify it directly before you wire article:published_time to it, this is one more place where Power Pages Liquid diverges from Shopify or Jekyll Liquid.
Step 3: the trap. Crawlers cannot sign in
This is where good intentions cause damage.
You build a beautiful product detail page behind authentication. You add Open Graph tags. You share the link. The preview is empty. So you widen the table permission until the tags fill in, and now the data is public.
The short version, before the mechanism: a crawler is an anonymous visitor, nothing more. Anonymous-readable content gets real Open Graph tags, that is the whole goal. Authenticated content renders a page the crawler can reach, but any tag built from a record Anonymous cannot read comes back blank, and widening that read permission to fix it exposes the record to every anonymous visitor, not just crawlers. The fix is never to open the table. It is to give the crawler something else to read.
The mechanism is worth understanding precisely, because it has two independent layers.
Page-level access is governed by page permissions. Microsoft's design studio option is literally "Anyone can see this page", and the docs say that when it is selected, "the page is public on the web and available to anyone".
Data access on that page is a separate question, governed by table permissions bound to the Anonymous Users web role. Microsoft is blunt about how that role behaves: "This role is intended to be used with table permissions. It doesn't respect any other rules or permissions. A site can have only one Anonymous Users web role for unauthenticated users."
A crawler is an unauthenticated HTTP client. It gets exactly the Anonymous role, no more. So if your Open Graph tags are built from a record that anonymous users cannot read, the page renders but the tags come back blank.
The tempting fix is to grant the Anonymous role Read on the table so the tags populate. Do not do that. Table permissions are not scoped to one template. Microsoft states that "Access to Dataverse records is automatically restricted in Power Pages when using forms, lists, Liquid, the Portals Web API, and other components accessing Dataverse tables". Read is Read: every list, every form, every Web API call that resolves against that table now answers to anonymous visitors too. Microsoft's own Site Checker flags exactly this pattern, calling out table permissions "assigned to the Anonymous web role that expose unintended data".
The right move is smaller and safer: build a curated public teaser page.
One page. Anonymous readable on purpose. It carries the marketing copy, the image, and the Open Graph tags, and it is backed either by static snippet content or by a deliberately narrow table that holds nothing confidential. The call to action on that page points into the authenticated area. The crawler gets a rich card, the human gets a sign-in prompt, and your production tables never widen.
Curate the shop window.
Do not unlock the warehouse.
One more small requirement while you are at it: image size. The Open Graph protocol itself does not mandate an exact size, but Facebook's own sharing guidelines do: 1200 by 630 pixels, close to a 1.91:1 aspect ratio, and every other platform, LinkedIn included, has standardised on the same numbers. Upload it as a web file and reference the absolute URL, crawlers do not resolve relative paths reliably.
The gate you will hit first: robots.txt
Before you chase any of the above, check one thing that has nothing to do with Liquid. Power Pages ships with a default robots.txt that blocks every crawler from the entire site: User-agent: * / Disallow: /. Tested directly: LinkedIn's Post Inspector refuses to even attempt a preview against a URL sitting behind that default. Its own error is explicit: "We did not re-scrape [url] because the URL or one of its redirects is blocked by rules set in robots.txt file of its URL domain." Perfect Open Graph tags on a page the crawler was never allowed to fetch buy you nothing.
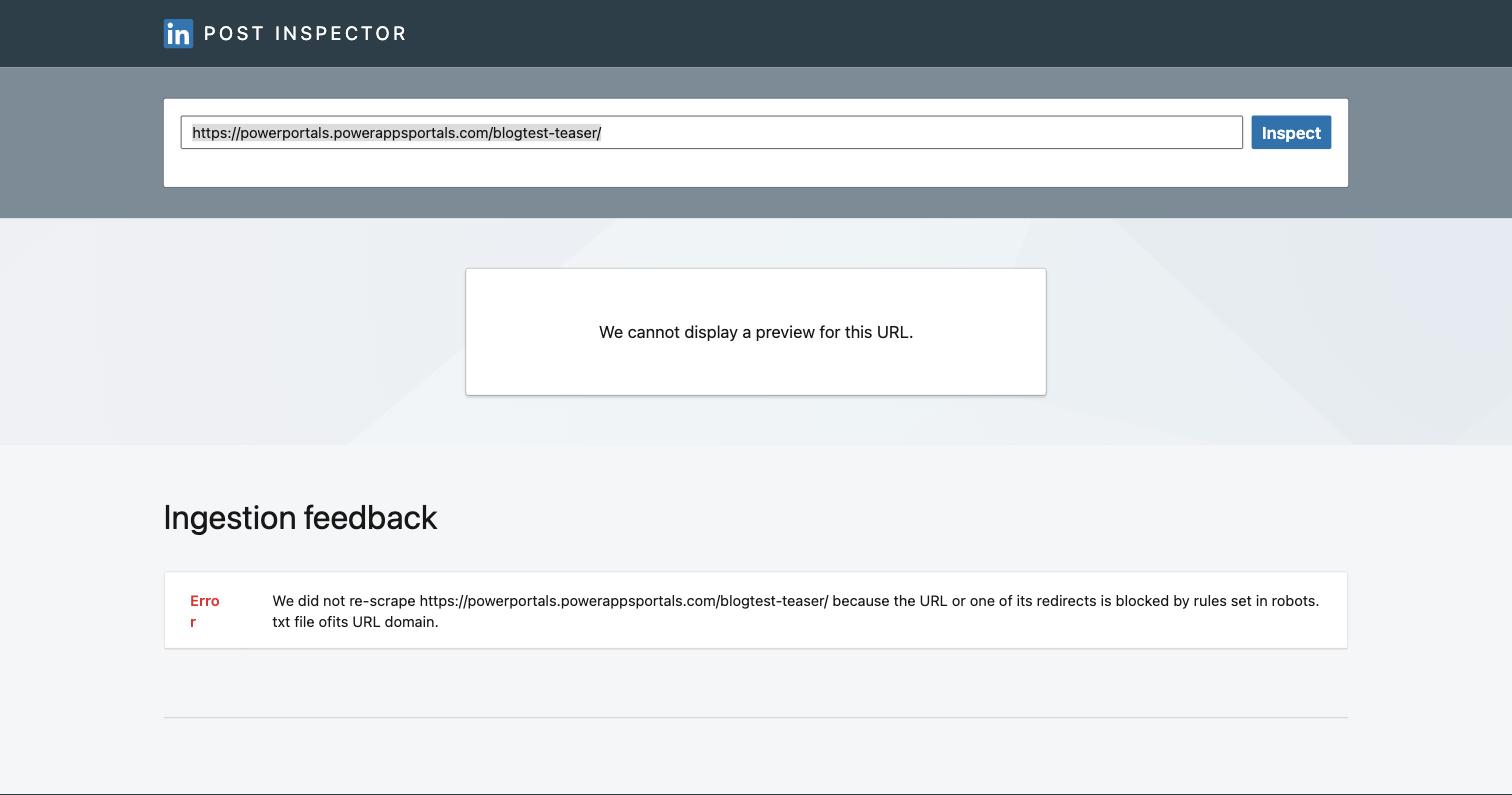
Microsoft's documented fix is a web file named Robots.txt at your site root with an empty Disallow:
User-agent: *
Disallow:
That opens the entire site to crawling, which is one legitimate choice. If you would rather keep most of the site out of search results while still letting crawlers reach your one curated teaser page, scope it instead:
User-agent: *
Disallow: /
Allow: /your-teaser-page/
This follows the standard robots exclusion convention where a more specific Allow rule wins over a broader Disallow, and it costs nothing in terms of data exposure since robots.txt only ever signals crawl intent, never data access. It does not touch table permissions or page permissions. Confirm the scoped version against your own site with the Post Inspector before you rely on it, not every crawler implements the specificity rule identically.
How to verify it actually works
Configuration changes like web templates and content snippets go through the server-side cache, so do not trust what you see immediately after saving. Do not just wait for it either: open /_services/about on your site and clear the cache from there, and the change is live right away. Skip that step and Microsoft's own SLA still guarantees it within 15 minutes on its own, but there is no reason to sit around for it.
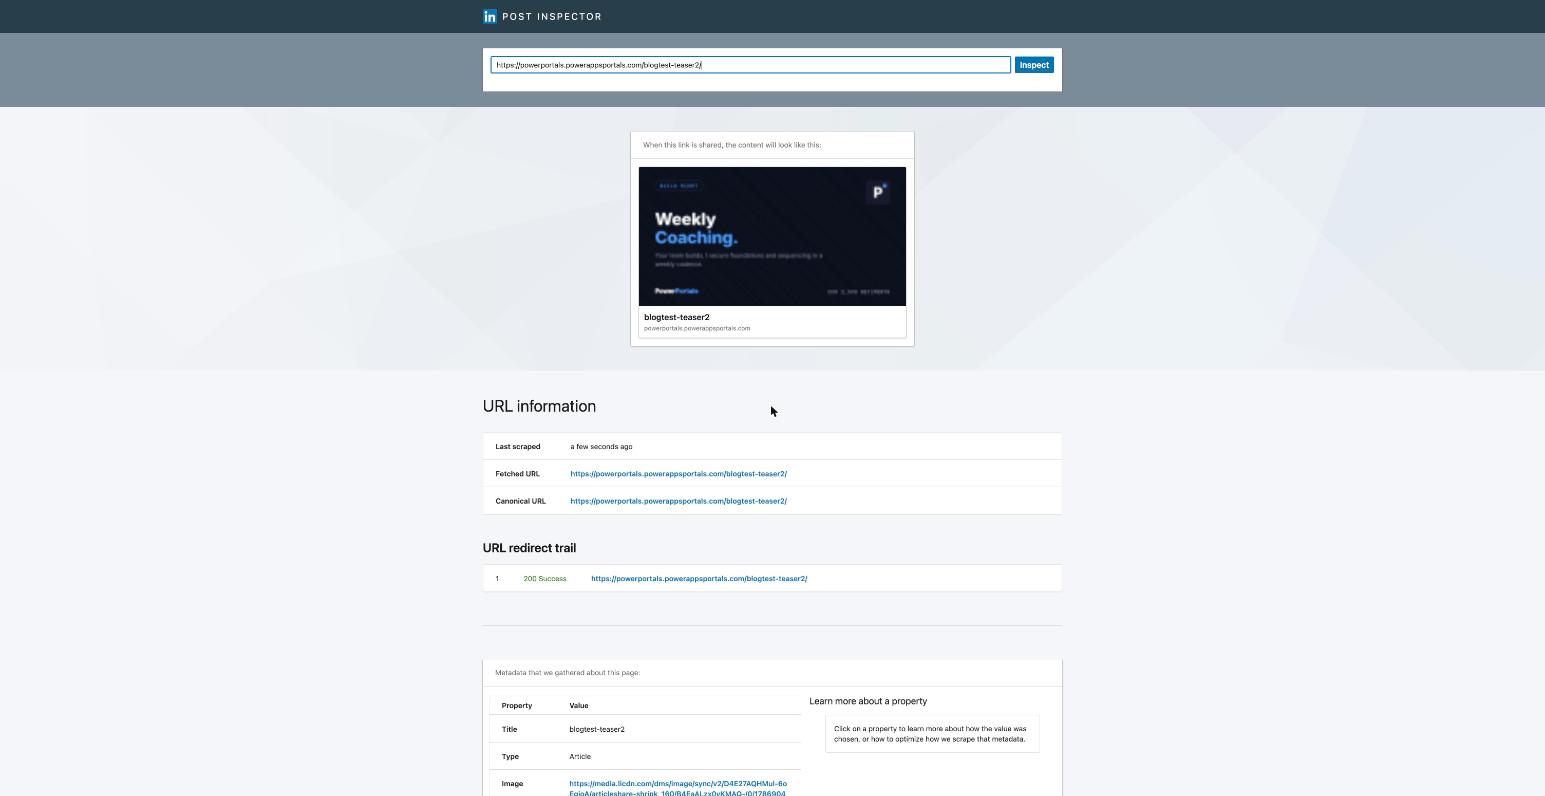
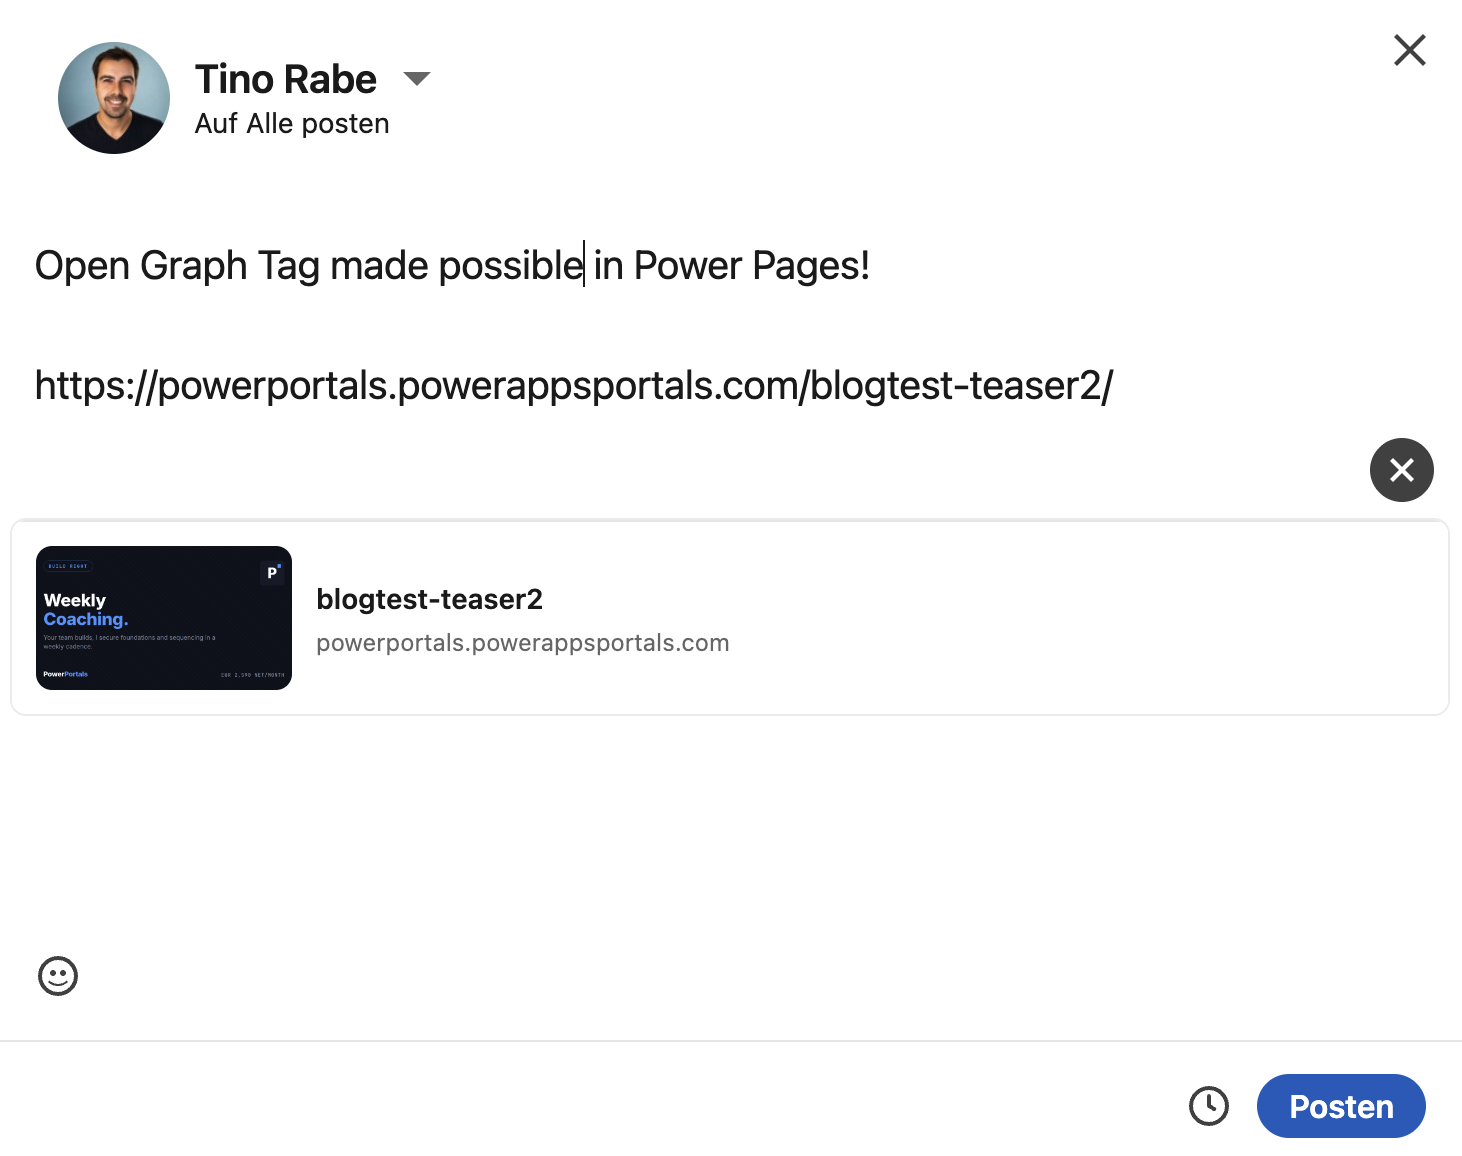
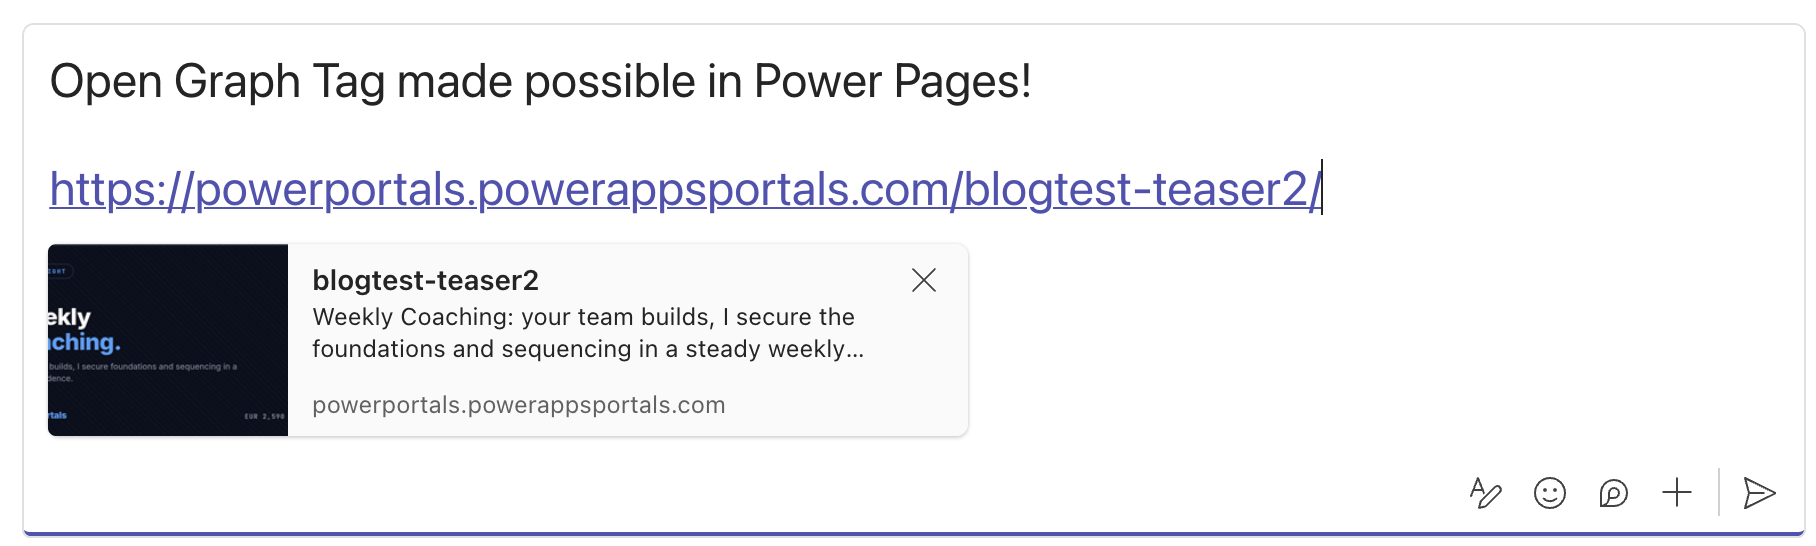
Then test with the tools that actually parse Open Graph tags, not your own browser. LinkedIn's Post Inspector and Facebook's Sharing Debugger both fetch the page fresh and show you exactly what they see, including hard failures like a robots.txt block. Pasting the link into a Teams chat is worth doing too, and separately: different platforms render different subsets of the same tags. In testing, LinkedIn's share composer showed the title and image, Teams additionally rendered the og:description in the same preview card. Confirm on at least two platforms before you call it done, and use each inspector's cache-refresh function rather than guessing, every one of these platforms caches aggressively.
What this actually buys you
No shop. No checkout. No new licences. One custom page template, a content snippet, one curated teaser page, and one image.
The result is that every link to your portal, in every Teams channel and every LinkedIn post and every email preview pane, stops looking like a broken URL and starts looking like a product. For most Power Pages sites that is the single highest-leverage hour of work available.
It is also the smallest possible step toward e-commerce, which is exactly why it is worth taking first.
Want this built into your site without the trial and error?
Weekly Coaching is my fixed-price format for exactly this: one recurring session a week where we work on your portal, in your environment, with your team. Meta tags this week, table permission hygiene the next.
Weekly Coaching, fixed price, no surprisesRelated Articles
Power Pages Security Architecture
Table Permissions, Web Roles, and the hierarchical security model in detail, the mechanism behind Step 3 above.
Read article → TutorialMaker's Guide: Data in Power Pages
How Dataverse data is exposed and consumed in Power Pages, background for the page and entities objects used here.
Read article →Sources
- Enhanced data model, functional parity statement
- Web templates in Power Pages, including "Use Website Header and Footer"
- Store source content by using web templates
- What is Liquid? Server-side processing statement
- Available Liquid objects, including page, request, snippets, entities, website
- Available Liquid filters, including escape, strip_html, truncate, default, base
- Customize content by using content snippets
- Power Pages security overview, anonymous users
- Create web roles, Anonymous Users role behaviour
- Control page access, "Anyone can see this page"
- Set table permissions
- Site Checker configuration issues, anonymous exposure
- Clear server-side cache, manual invalidation and the 15 minute SLA
- Robots.txt and search engine indexing in Power Pages
- The Open Graph protocol specification
- Facebook sharing image guidance, 1200 x 630 and 1.91:1
- Community precedent for the Head/Bottom content snippet (not official Microsoft documentation, confirmed by direct testing)
- Oliver Rodrigues, "Power Apps Portals: Adding a <head> meta tag" (2020), the original write-up behind the Head/Bottom approach